The Netscaler VPX Express is a great tool to test and play with Netscalers at no cost to you. Great for home labs and even testing various things. It is pretty well featured. You can find out more about the Netscaler VPX Express here in a previous blog post where I touch on benefits and limitations. I have been asked several times for a How-to on deploying the Netscaler VPX Express, I will do further posts on basic Netscaler setup and features in future posts.
Here are the basic steps for getting the Netscaler VPX Express up and running.
- Download the NetScaler VPX virtual appliance package using the link below. Packages are available for both XenServer and VMware.
- Import NetScaler VPX Express onto the virtualized server of your choice.
- If you don’t currently have XenServer, download a free version of XenServer.
- If you don’t currently have VMware ESX, evaluation versions can be downloaded from vmware.com.
- Get and activate your free NetScaler VPX Express license via the get license link below.
- Please note you will need to get your license after you deploy the VPX to get information from the virtual machine to license it properly.
- Want more than one license? just click get license again.
Click here for full details and how to steps.
1. Where to get the Netscaler VPX Express
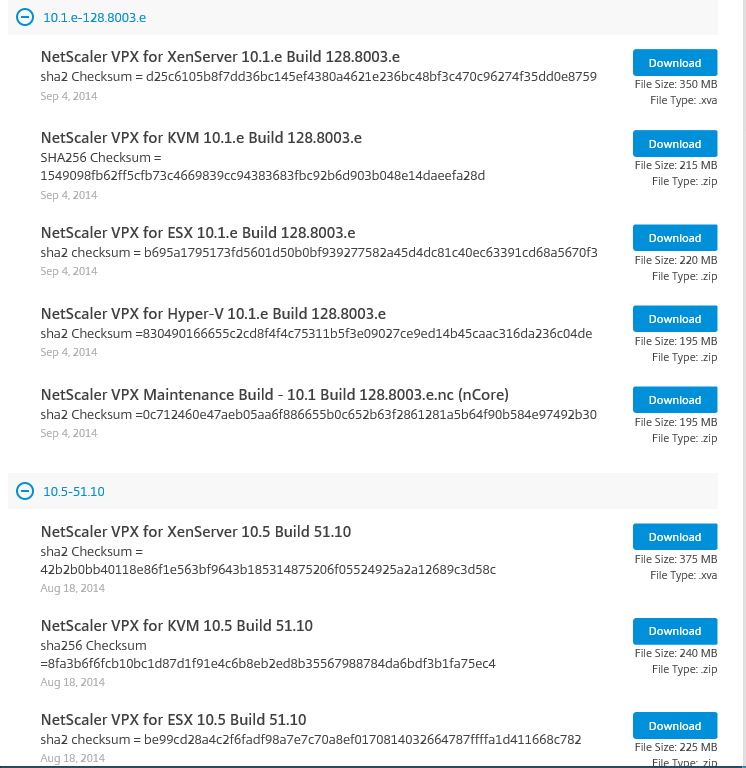
- https://www.citrix.com/downloads/netscaler-adc/virtual-appliances/netscaler-vpx-express.html
- Make sure you download the correct version number that you need to test or the latest (the latest edition is not always expanded so you may have to look at the version numbers.
2. Import Netscaler VPX Express onto the virtualized server of your choice (steps below are for ESXi)
Fat Client (ESXi)
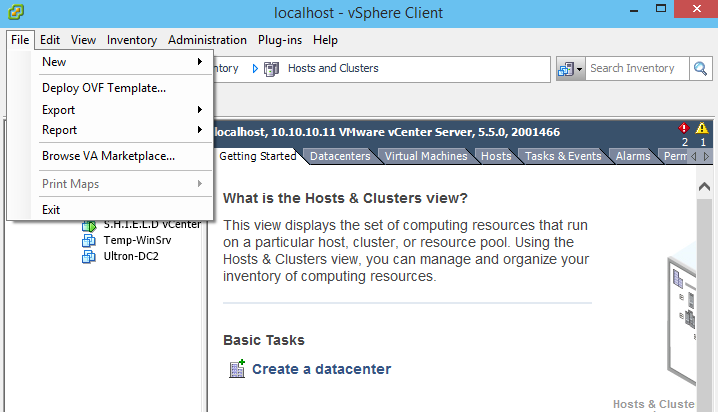
- Log in into your Hypervisor (ESXi)
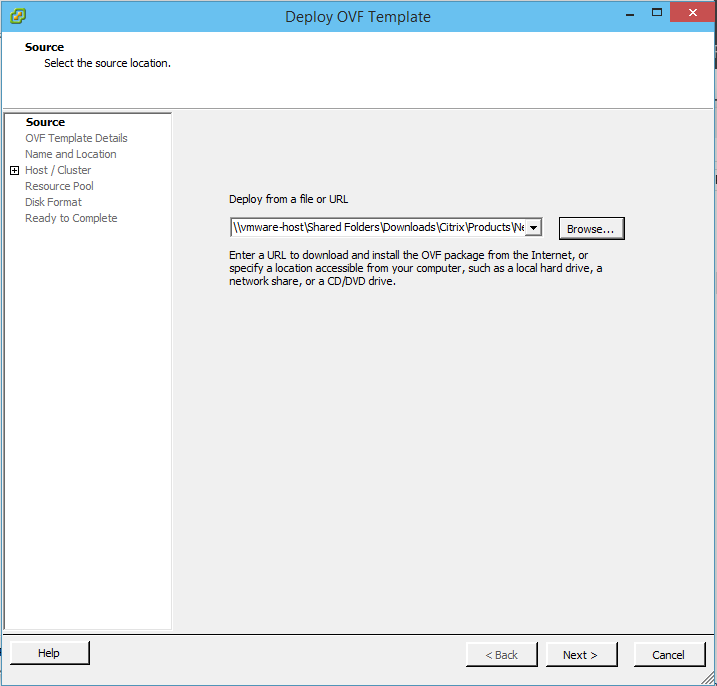
- Click File -> Deploy OVF template
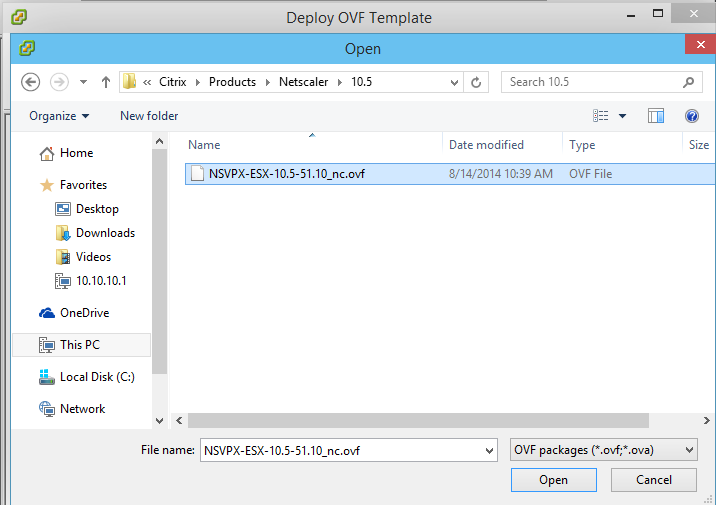
- Browse to the Netscaler Download (please note the download is a ZIP file and will have to be extracted to see the OVF) -> Click Open
- Click Next on Source Selection
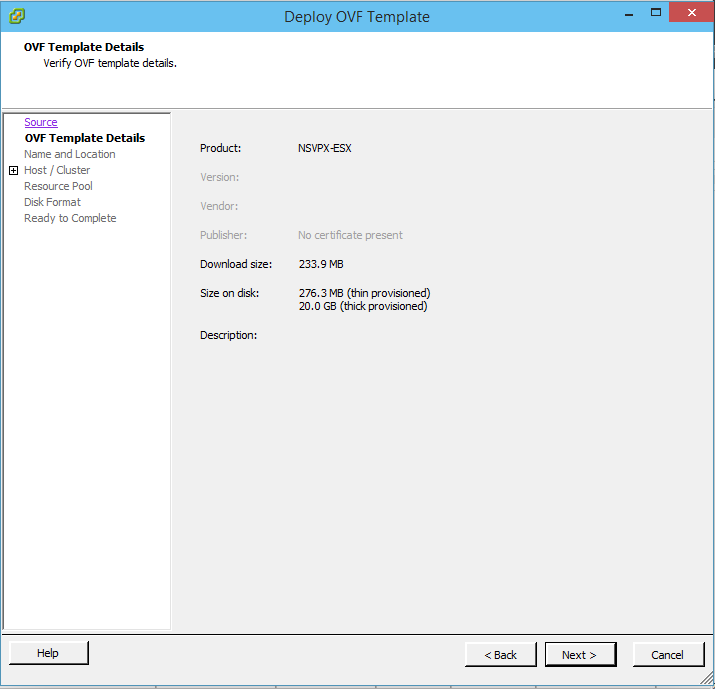
- Click Next on OVF Template Details
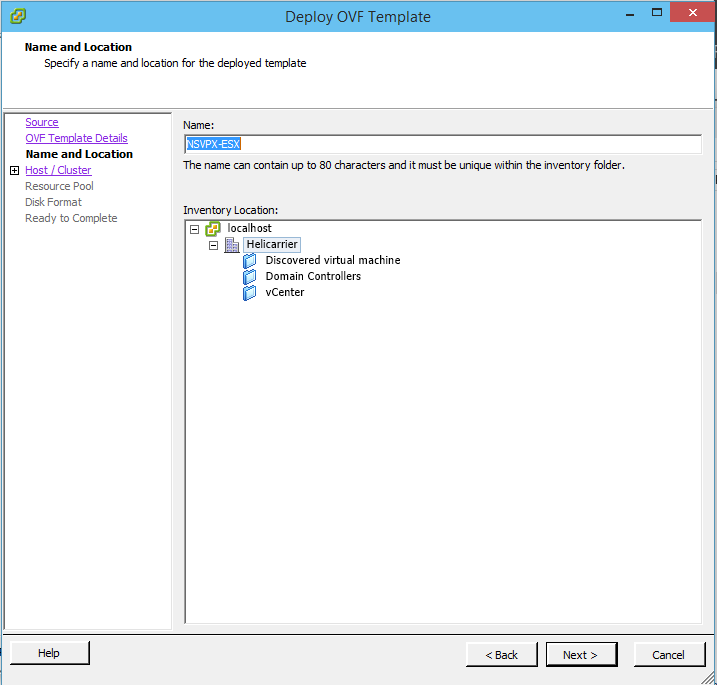
- Change Name to desired Netscaler VPX Name -> Click Next
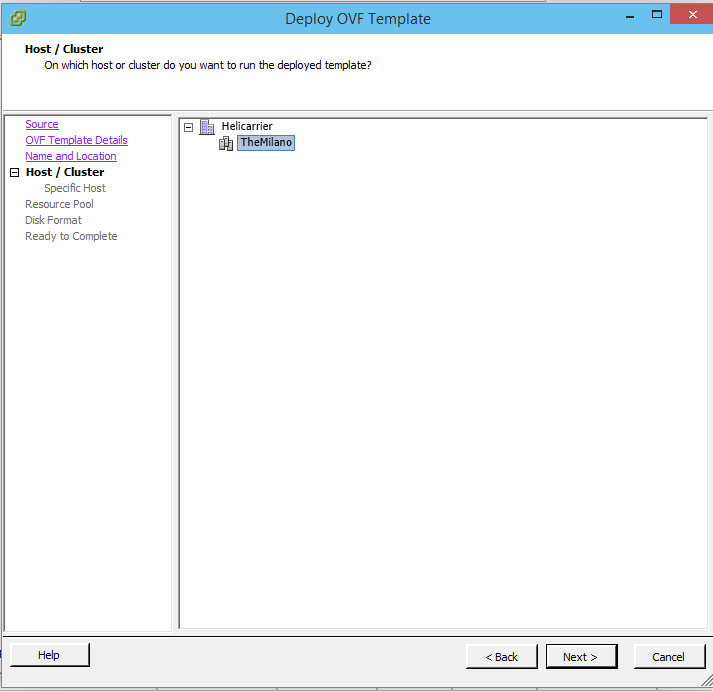
- Select Cluster you would like to deploy to -> Click Next
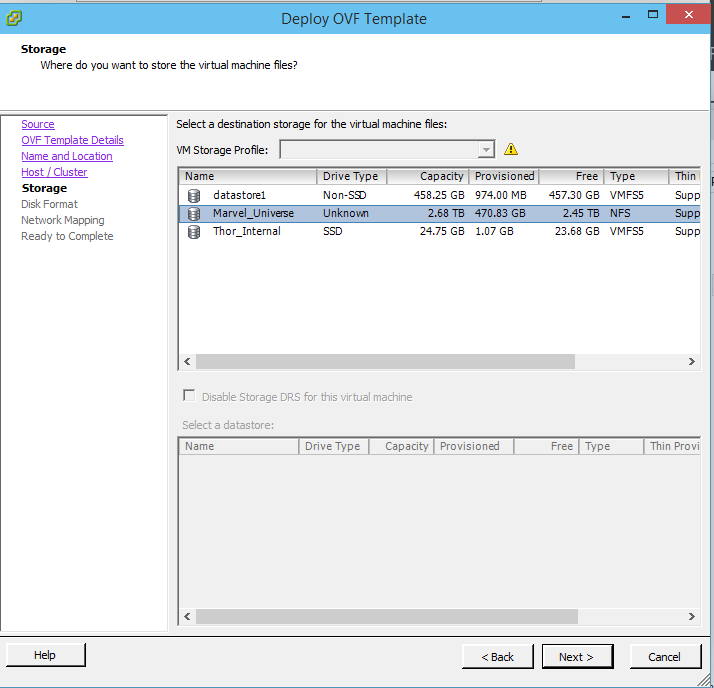
- Select Datastore where the VPX will be stored -> Click Next
- Click Next on Disk Format screen

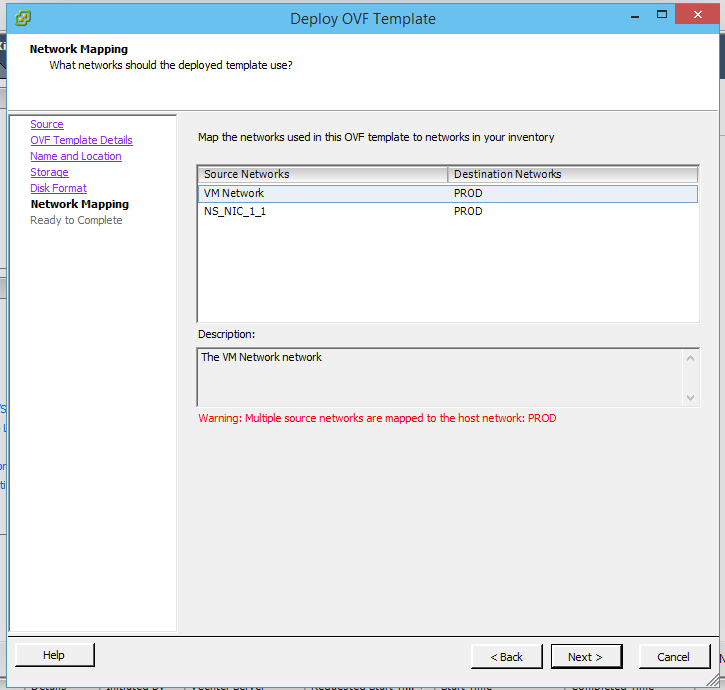
- Click next on Network Mapping (please note the error in the screenshot) I plan on only having one NIC in my lab setup for VPX, if multiple NICs are required you may have to more portgroups created.
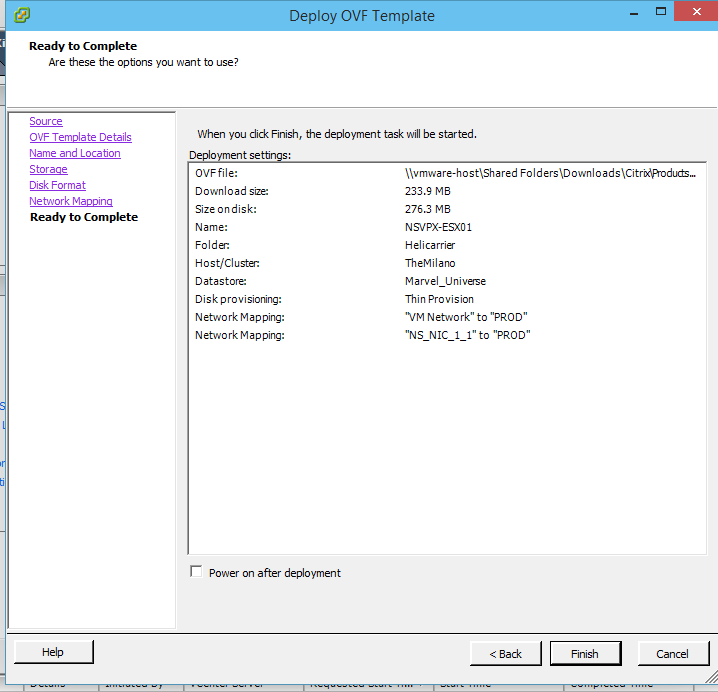
- Review Ready to Complete Screen for accuracy -> Click Next
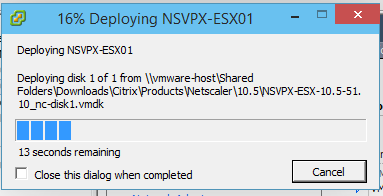
- The VPX will deploy. This not take long as the VPX is very small.
- Upon completion, you should see the following screen. -> Click Close

- Before Powering ON the VPX, I will be removing the unnecessary Network Interface. Right click the VM and Click Edit Settings…
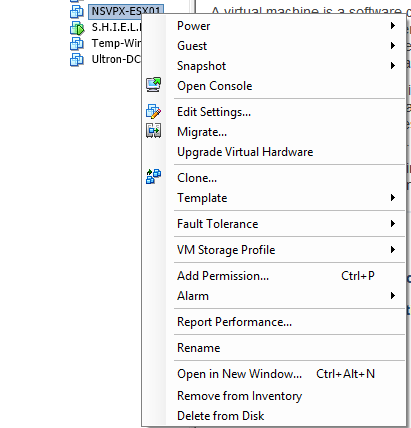
- Highlight the Network adapter that you would like to remove and click the Remove button
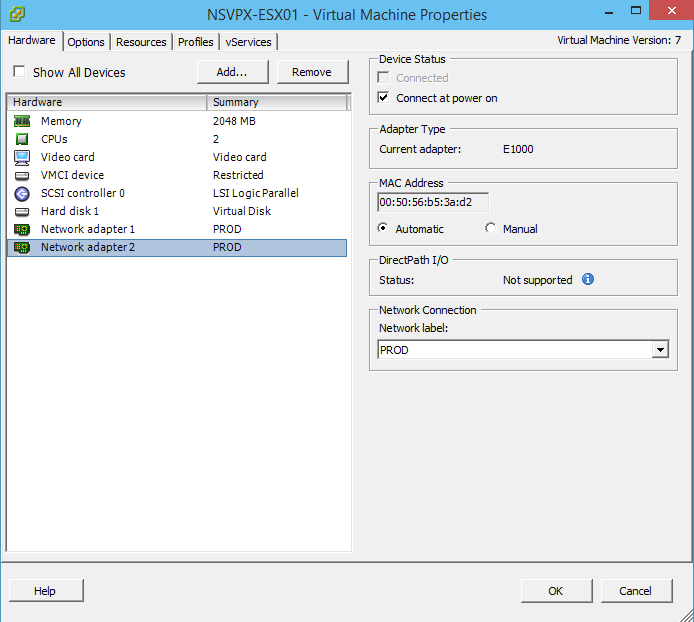
- The Network Adapter should now show in strikethrough as below -> Click OK at the bottom of the window

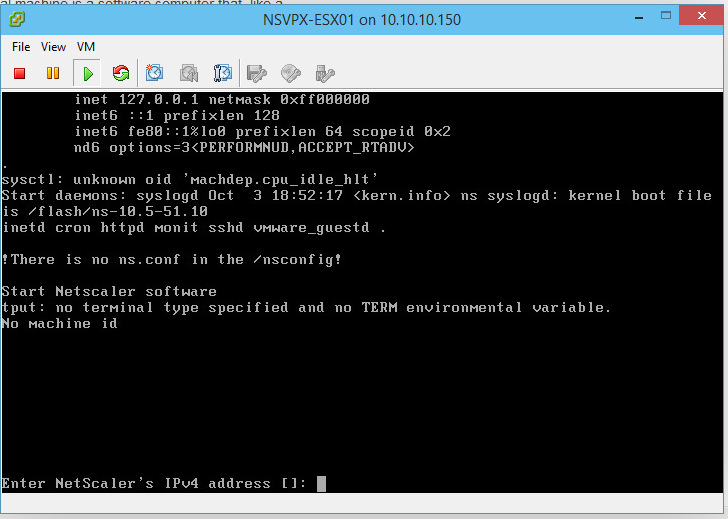
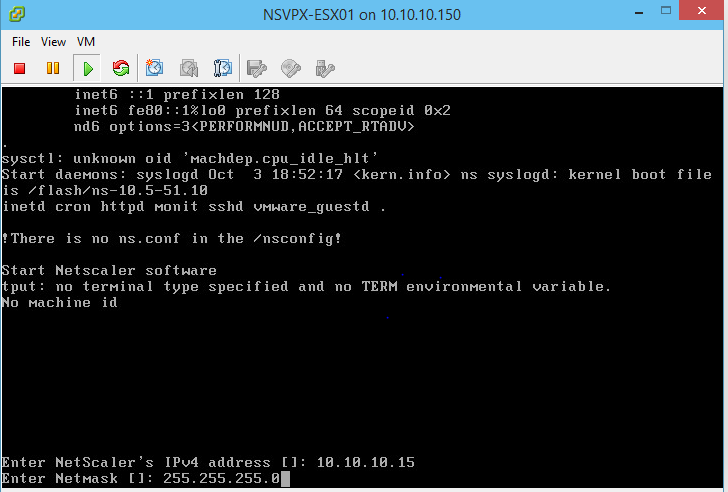
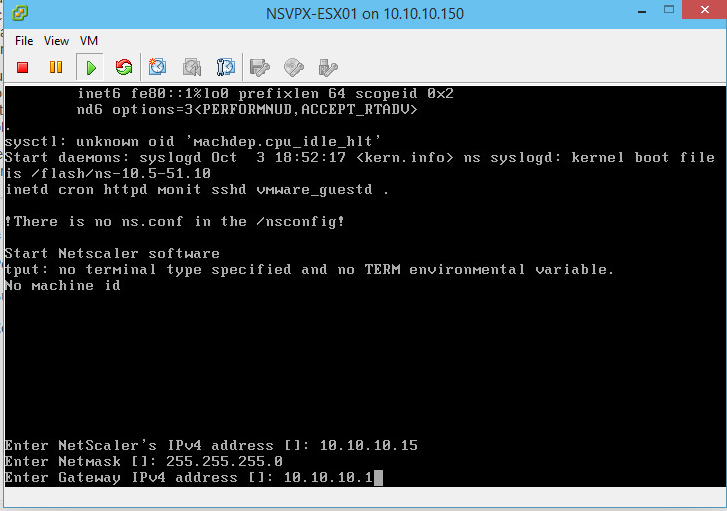
- Now you can power on the VPX and begin the configuration. Enter an IPv4 address and hit Enter
- Enter a Subnet Mask and hit Enter
- Enter Gateway IPv4 address.
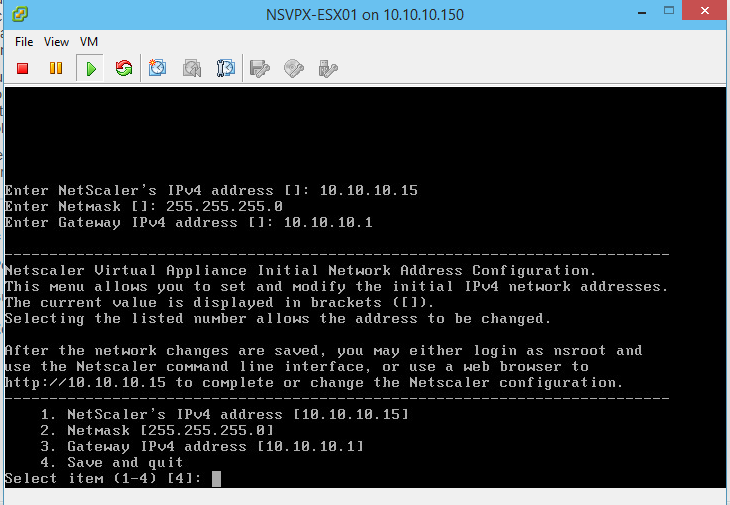
- Review settings and hit 4 or Enter to accept the default to save and quit. Follow on screen prompts if changes need to be made.
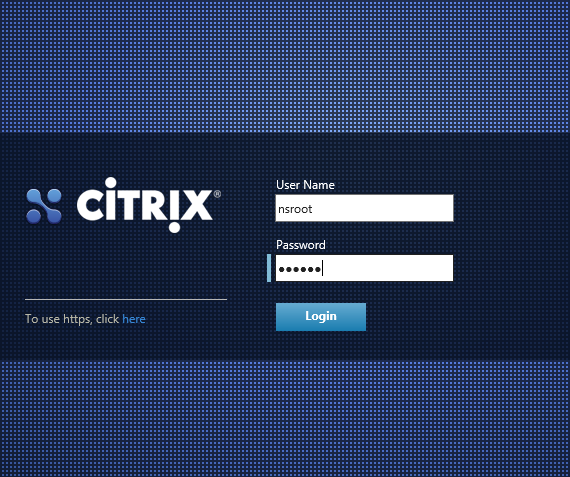
- Now your netscaler is powered on and you should be able to login using the default credentials of nsroot/nsroot
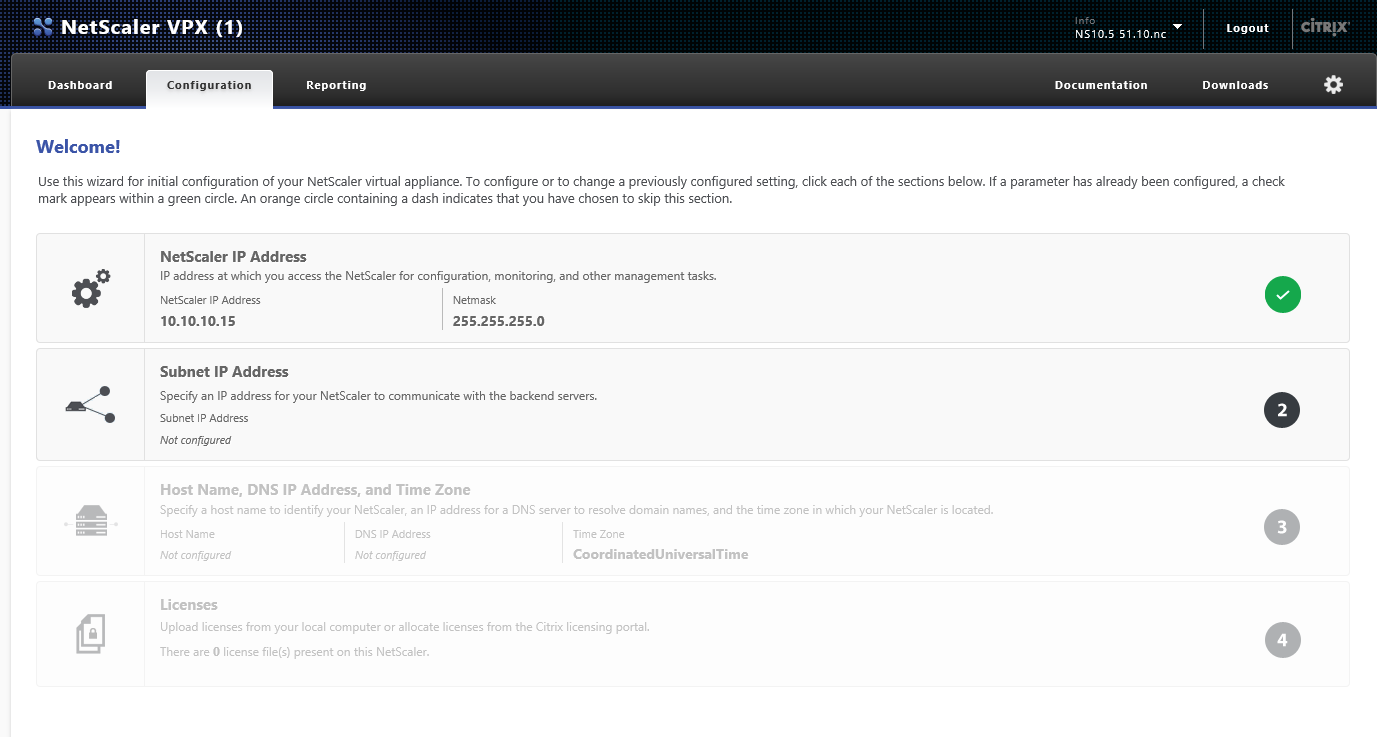
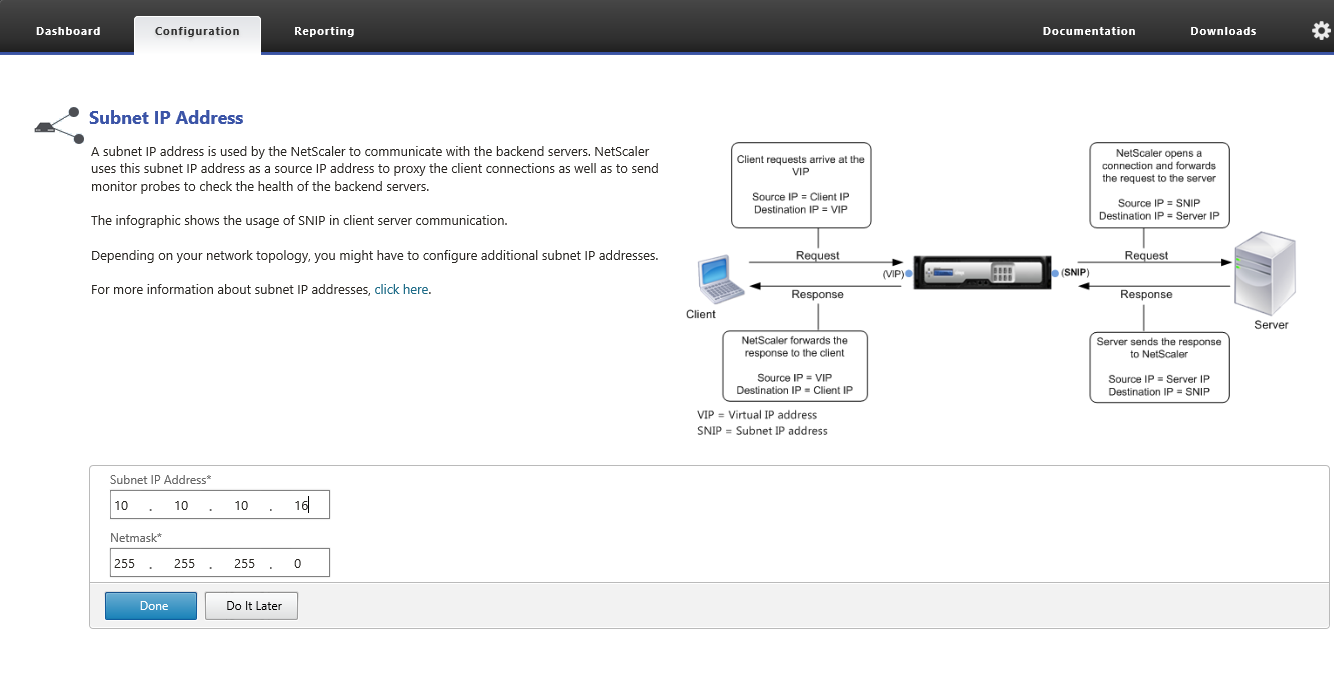
- Follow the configuration wizard and click Step 2 to enter the Subnet IP address or SNIP
- Enter the SNIP IP address
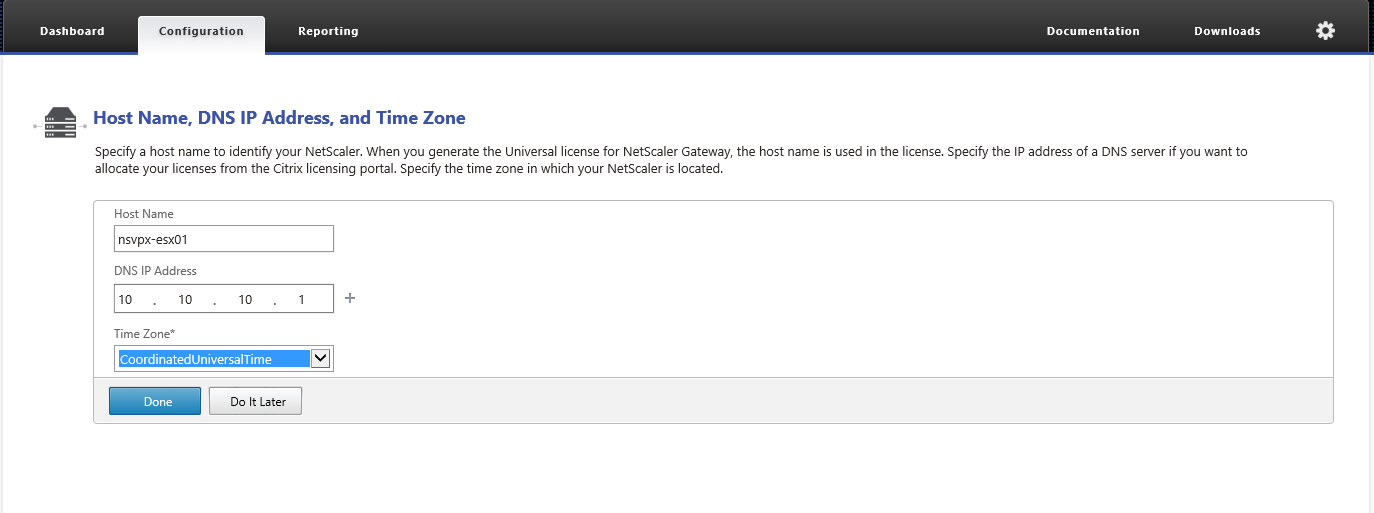
- Click Step 3 Enter Host Name and DNS IP address and change Timezone if necessary. -> Click Done once complete
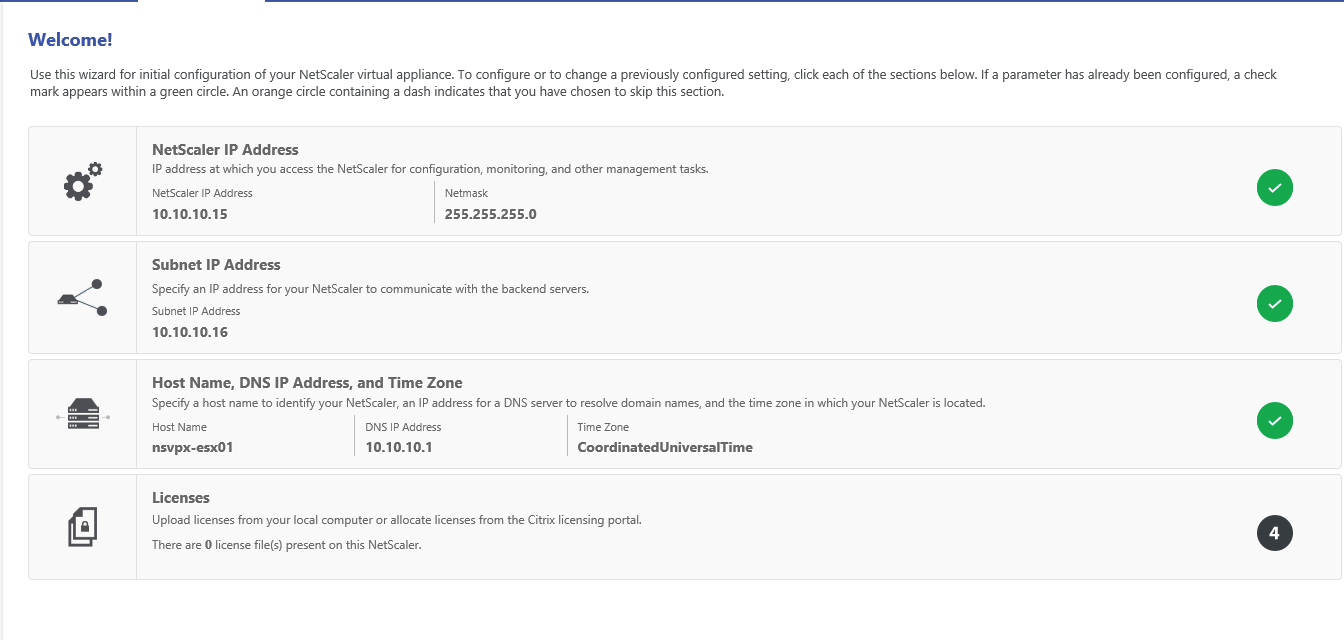
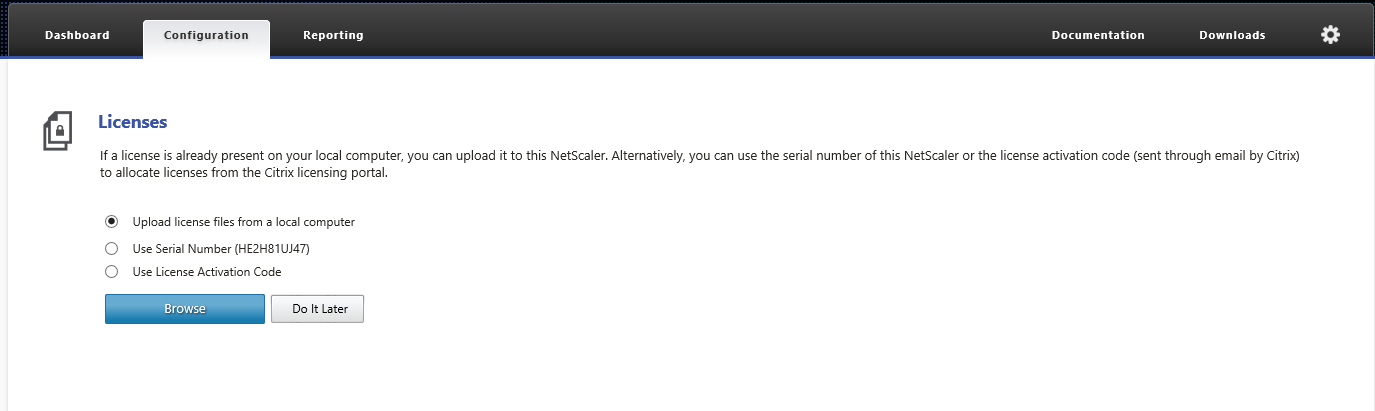
- Click Final Step to enter Licensing and complete the configuration.
- Now you will need to create and download the License for your shiny new Netscaler VPX
- https://www.citrix.com/downloads/netscaler-adc/virtual-appliances/netscaler-vpx-express.html
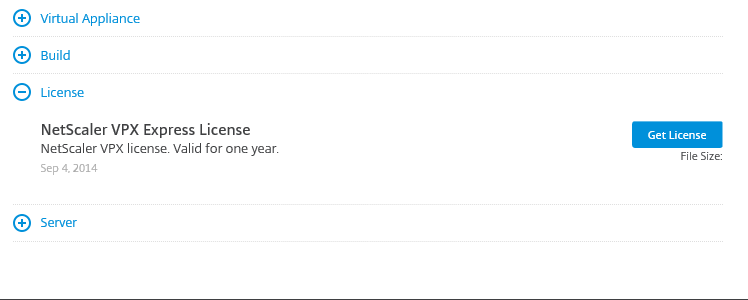
- Toward the bottom of the page is a License section -> Expand selection by clicking + sign and click Get License
- Click “Yes I accept” to accept the End-User License Agreement

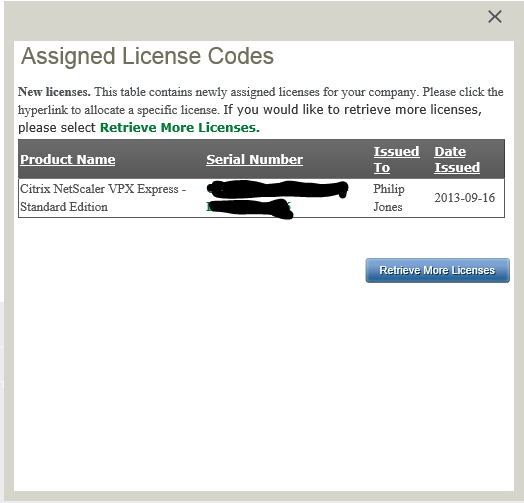
- Click the green link under Serial Number in the area I have blacked out in the screenshot below.
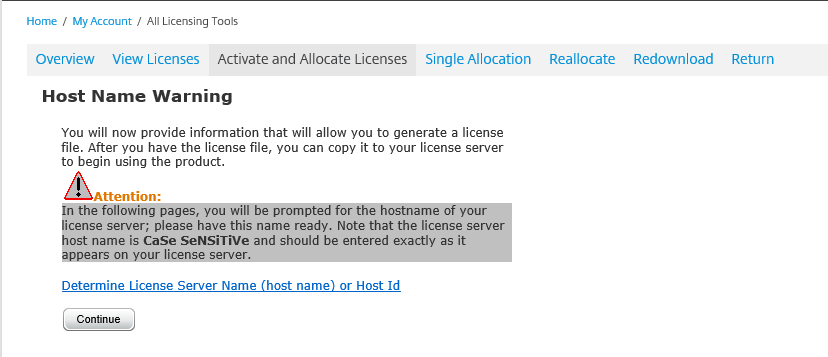
- Click continue on Host Name Warning
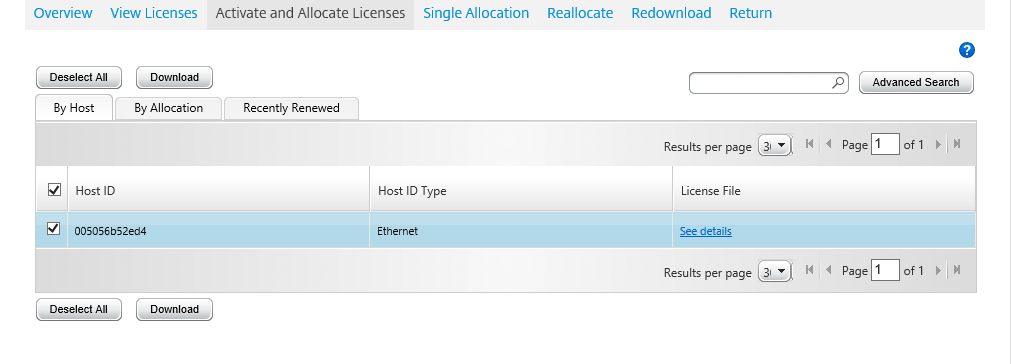
- Click in the field Host ID and enter the MAC address of the VPX. You can find this in VMware in the network adapter properties in the Edit Settings option of the VM.
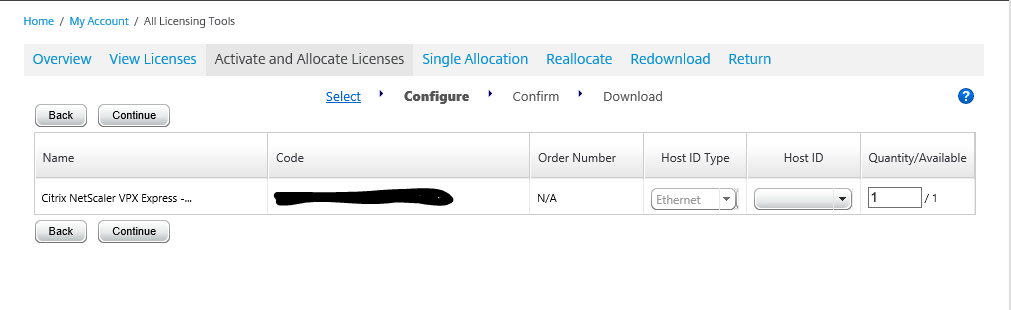
- Click Continue and you should go to the Next step.
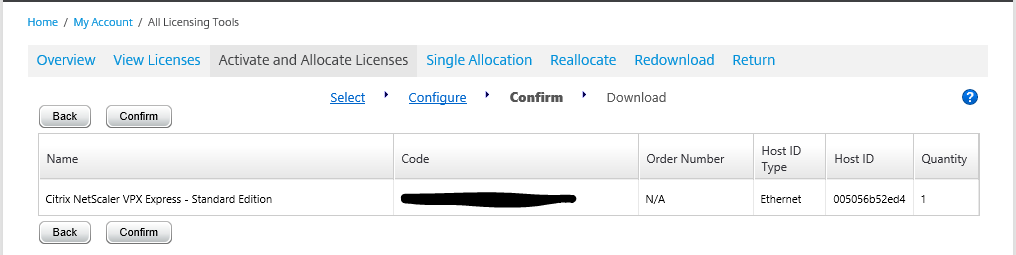
- Click OK to go the license download page.
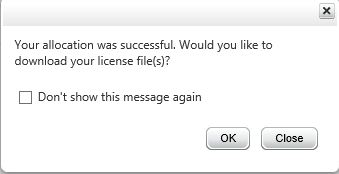
- Click Download to download the license.
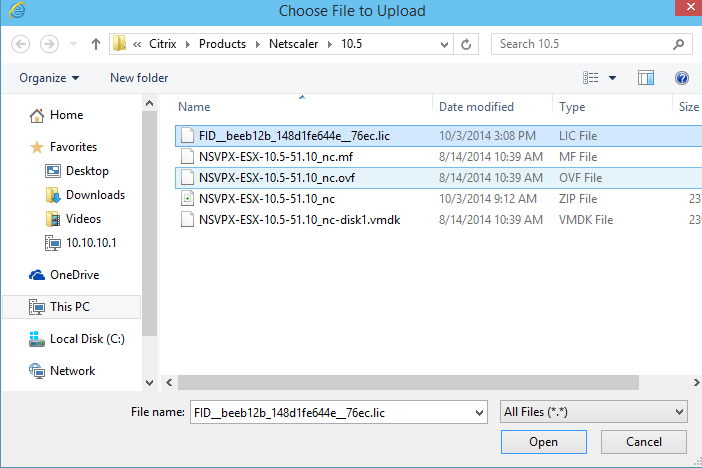
- Return to your browser window with the Netscaler VPX – On the licensing selection, select Upload license file from the local computer
- Browse and locate the license file downloaded from MyCitrix
- If applied successfully, you should see the below screen. Reboot the appliance
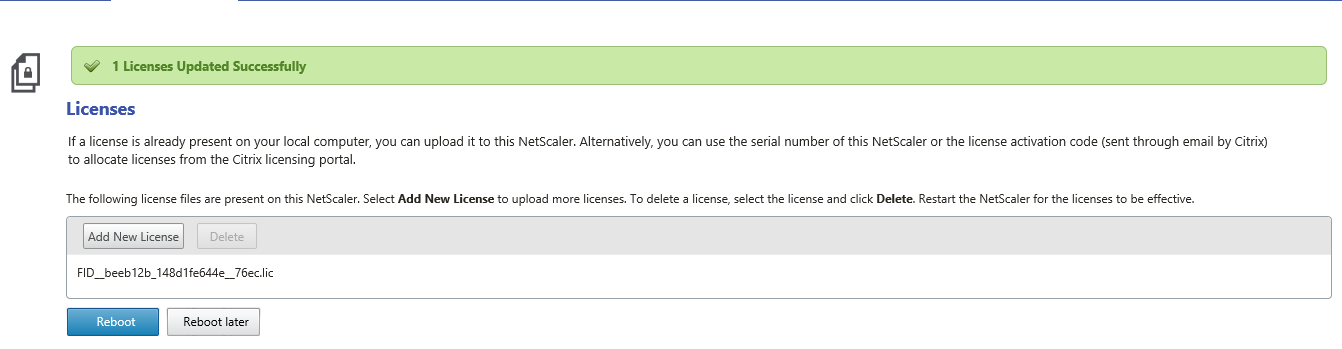
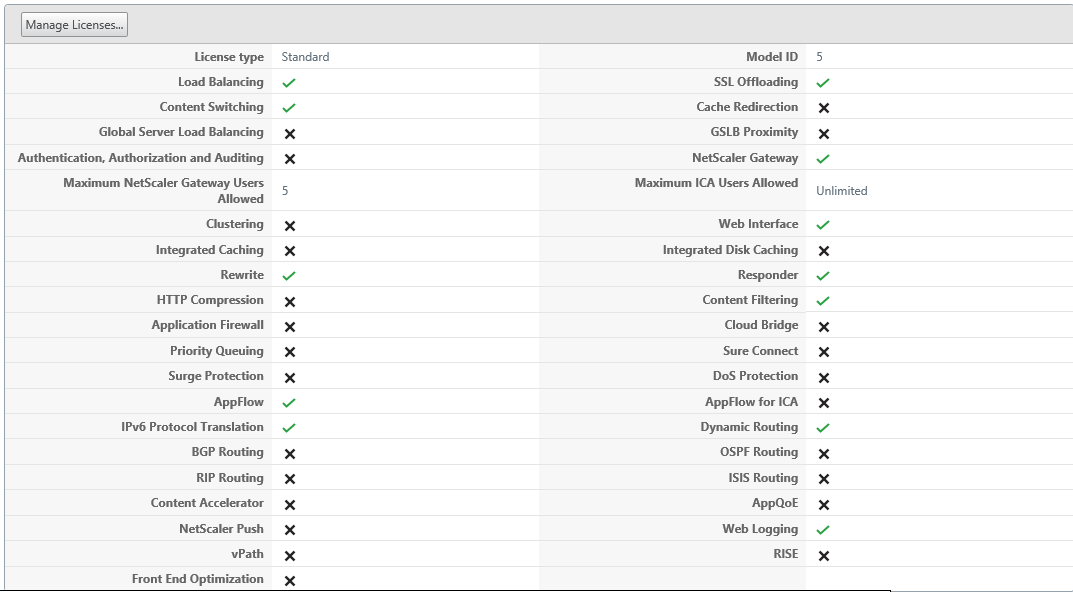
- Log back into the Netscaler and verify the licenses in the Licensing section. It should appear as below (I have seen this take two reboots). If it does not come back successfully and shows all Xs, please check to make sure the MAC matches the Host ID you entered earlier.
Congratulations you have successfully completed deploying the VPX Express.