• Category Archives XenApp
  • Heartbleed – OpenSSL Vulnerability in a Citrix Enviornment

    There is a lot of news and chatter going on around right now about the OpenSSL vulnerability Heartbleed. This is a critical issue. as documented here. So what is Heartbleed and what makes it so dangerous.

    The (1) TLS and (2) DTLS implementations in OpenSSL 1.0.1 before 1.0.1g do not properly handle Heartbeat Extension packets, which allows remote attackers to obtain sensitive information from process memory via crafted packets that trigger a buffer over-read, as demonstrated by reading private keys, related to d1_both.c and t1_lib.c, aka the Heartbleed bug.

    This is a very wide reaching issue and considered critical. Patching OpenSSL or products alone will not be enough to solve the issue. Your certificates would have to either be regenerated or rekeyed and depending on how your programs interact this may require additional work for programs that connect to each other such as XenDesktop connecting to a vSphere instance as it imports the certificate for trust so if you update vSphere certificate you also need to import your new vCenter certificate into XenDesktop.

    Citrix has released a Security Advisory detailing the products affected by Heartbleed. Other vendors are also coming out with articles detailing their products affected such as VMware EMC and Cisco.  Per the Security Advisory released from Citrix most of the products that Citrix has in its portfolio are unaffected but check the article to confirm and they are still researching some of their products.

    Many Citrix environments run on VMware vSphere and some versions such as vSphere 5.5 are affected by Heartbleed. XenDesktop (any version) as well as XenApp 7.x and higher are dependent on the certificate that vCenter uses. If you resolve the issue and regenerate the certificate for your vCenter, you will need to import the certificate into XenDesktop following these instructions again that were completed on the initial setup.

    My general advice is to find and document the items in your environment that are affected and map out any dependencies and create an attack plan to resolve these as this is a major compromise in your security. If you aren’t sure of what those may be, reach out to your partners who may have detailed information on what to look for.


  • Wfica32 Application State “Application not running” workaround

    Recently I ran into an issue with double hop ICA session from a XenApp server. For those not aware of this, this is a situation where you launch xenapp from a local farm and connect to another farm through that XenApp session, hence Double Hop.

    The issue is that with changes in Windows 2008 architecture, when processes are changed. In the Citrix Management Console this represents itself as Application Status “Application not running” and no Application name listed. This will prevent XenApp application limits from taking hold.

    This issue is very similar to the Citrix KB article here documenting a resolution on how to use VBscript to launch Internet Explorer. I tried that resolution and in my case it did not fix the issue. I was launching wfica32.exe to launch a remote session using an ICA file. Even when launching wfica32.exe as a published application with no script, I saw the above symptoms.
    I found that if I put a pause and hid the script with ctxhide.exe as long as the script was running it would show the Application name and the correct Application State but this caused a different issue, user would close the double hop ICA application and the script would stay resident keeping the session open until it idled out and giving the user the idle timeout warning well after the user closed the actual session. This simply will not work so back to the drawing board.

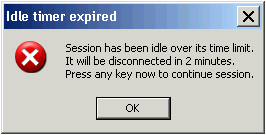
    This message also cannot be turned off as documented here.

    So my resolution was to come up with a way to detect if the process was running or not running and logoff the session based upon that. I tried several methods but wanted to keep it simple (KISS principle) so I stuck with the batch file that I was already using to launch the file anyway and added error detection into that script using tasklist to detect if the process was running.
    It is published with the following app settings in Xenapp
    ctxhide.exe C:adminapplaunch.cmd ICAfile.ica
    The Script
    REM —Copy all of this text into a notepad and save it as a batch file

    REM —to see if a program is running
    @echo off

    sleep 1
    REM – This will launch the ICA file. Publish the App in XenApp and call the paramater for the ICA file in c:Admin

    “C:Program Files (x86)CitrixICA Clientwfica32.exe” c:admin%1

    sleep 30

    :loop
    set runningprocess=wfica32.exe
    rem —- 1: all one line —-
    tasklist /FI “IMAGENAME eq %runningprocess%” /FI “Username eq %username%” | find /I “%runningprocess%” > nul
    rem —- 1: end of line
    IF %ERRORLEVEL% equ 0 echo %errorlevel%
    IF %ERRORLEVEL% equ 1 logoff
    sleep 300
    goto loop

     This script should be pretty easy to edit. Tasklist does not provide errorlevel so I used find to find the process and create the errorlevel. The script will stay resident until the wfica32.exe process is closed and within five minutes of ending the remote ICA session under that user context it will then do a logoff for that user. 


  • Citrix XenApp – Cannot Remove from Farm

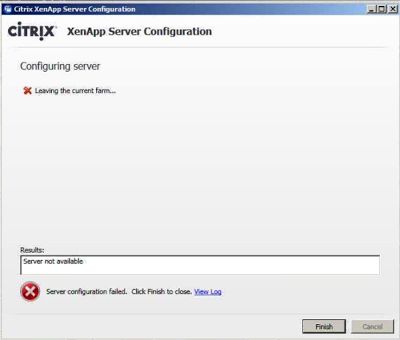
    Occasionally when administrating or building a Citrix XenApp server farm you may find the need to to remove your server from the farm but then you cannot remove the server. You may get the following error message “Server not available”.

    Luckily there is a fairly simple registry fix that you can do to simplify things and allow the disjoin from the farm.
    Locate the following registry key and change the value from 1 to 0

    HKEY_LOCAL_MACHINESOFTWAREWow6432NodeCitrixIMAStatus
    “Joined“=dword:00000000

     
    Then run:

    C:Program Files (x86)CitrixXenAppServerConfigXenAppConfigConsole.exe /ExecutionMode:Leave
     

    After the registry fix and the running the command you’ll be able to remove the server from the farm and then join an existing farm or create a new one again.


  • Windows 8 Citrix Reciever Preview In Windows Store

    For you early adopters of Windows 8 whether it be a laptop, tablet or even a virtual machine. Citrix announced the release of the Citrix Reciever for Windows 8 Preview is available in the Windows Store. I look forward to testing this client in my new lab.

    From the official article

    The Preview version can be used with Intel- or ARM-based Windows 8 devices and leverages the key capabilities in Windows 8 devices to provide follow-me apps and desktops, touch-enabled app selection, the ability to search apps via Windows 8 charms, and instant app and desktop access through Pin to Start.  It supports native Win 8 style (Metro) gestures as well as in-session and network printing.

    Citrix Receiver for Win 8/RT 

    Use the  Microsoft Store to locate it or  access it directly by clicking here

    You’ll need the Windows 8 RTM (release to manufacturing) version on your device.  You’ll also need CloudGateway Express ( Storefront Services ) for desktop and applications access and a properly-configured Access Gateway (Enterprise Edition) for remote access.  Future versions will use CloudGateway Enterprise for single sign on access to all of your web and SaaS apps.You can also use the Preview version with our Virtual Computer Demo Center.

    For system requirements and set up procedures refer to  Receiver for Win 8/RT eDocs.

    It needs to be noted that the standard Citrix Receiver for Windows is an option for Intel-based devices.
    It installs on the Windows 8 desktops and  provides our most advanced features, such as HDX optimizations for Lync, RemoteFX support, and  follow-me data with CloudGateway 2 and ShareFile.

    You can share your feedback and  obtain support for either version by posting issues on the Using Receiver on Windows 8 Forum.


  • Powershell XenApp Deployment Wizard v1

    Ever wanted an easier way to deploy XenApp machines en mass? Well have I got a treat for you.

    XenDesktop has an easy way to deploy virtual machines from Citrix Provisioning Server (PVS) but XenApp with PVS is missing this component making deploying virtual machines sometimes a very tedious task. I want to make that easier for myself, I mean the community :). I have began working on a script with another engineer and friend that should ease that pain. This script is only a v1 with future versions to support other hypervisors and remove some of the manual ad nauseum type work on large deployments.

    Currently the script is designed to do the following.

    Prerequisites:

    1. You will need to create two files currently placed in the root of C: (paths and files can be changed) 
      1. One file will contain a list of servers (servers.txt) and the other the list of ip addresses (ips.txt) Match up the lines in each file so the server and IP match up.
    2. You will need to run this script from the Provisioning Server
    3. Download and configure the Following Powershell Snap Ins
      1. XenServer Powershell Snap-IN
        1. Download XS-PS Windows installer
      2. Configure the PVS Powershell MCLI snap in
        1. The snapin comes with the Provisioning Services Console. To use the snapin, you have to first register it (requires .Net framework). If your Windows is 32bits, use this command: 
          1. “C:WindowsMicrosoft.NETFrameworkv2.0.50727installutil.exe” “C:Program FilesCitrixProvisioning Services ConsoleMcliPSSnapIn.dll” 
        2. For 64bits: “C:WindowsMicrosoft.NETFramework64v2.0.50727installutil.exe” “C:Program FilesCitrixProvisioning Services ConsoleMcliPSSnapIn.dll” 
        3. If you encountered error, make sure that you are running the Command Prompt as administrator. 
        4. Once registered, start a PowerShell console and add the snapin using “add-PSSnapIn mclipssnapin”. The main cmdlets are mcli-run, mcli-get, mcli-set and mcli-delete. To get a detailed help on the cmdlets, use mcli-help.

    Once you have completed the prerequisites you can run the script. The script is currently designed to do the following.

    1. Enter variables needed for script to run and confirm settings
    2. Create XenServer VMs based upon servers identified in c:servers.txt from template
    3. Create c:macs.txt listing all Mac addresses for each XenServer VM created from servers.txt
    4. Add IP MAC Reservations to primary Microsoft DHCP Server
    5. Add Devices to Citrix PVS server in appropriate collection and Site
    6. Export IP Mac Reservations from primary Microsoft DHCP server to Secondary DHCP server

    As this script is a v1 it is making a lot of assumptions and I plan on building more logic and support for various configurations into the script. If you have any ideas or suggestions, please leave me a comment or contact me.

    Upcoming Features

    • VMware Support

    ##########################################################################
    # XenApp PVS Deployment Wizard
    # This script is designed to help deploy XenApp machines en masse to a XenApp Farm using XenServer and Microsoft DHCP
    # XenApp_Wizard_v1.ps1 script written by Phillip Jones and David Ott
    # Version 1.0
    # This script is provided as-is, no warrenty is provided or implied.
    #
    # The author is NOT responsible for any damages or data loss that may occur
    # through the use of this script.  Always test, test, test before
    # rolling anything into a production environment.
    #
    # This script is free to use for both personal and business use, however,
    # it may not be sold or included as part of a package that is for sale.
    #
    # A Service Provider may include this script as part of their service
    # offering/best practices provided they only charge for their time
    # to implement and support.
    #
    # For distribution and updates go to: http://www.wwwp2vme.com
    ##########################################################################

    add-pssnapin xenserverpssnapin
    add-pssnapin mclipssnapin

    # Variables Section – This will define the variables that the script requires in order to create the VMs in DHCP, PVS and XenServer

    $sitename = Read-Host “Enter the PVS Site Name.”
    $collectionname = Read-Host “Enter the PVS collection name.”
    $xenserver = Read-Host “Enter the XenServer host name to connect to.”
    $XSBase = Read-Host “Enter the base VM to copy. (Case Sensitive!)”
    $SR = Read-Host “Enter the storage repository name. (Case Sensitive!)”
    $pdhcpip = Read-Host “Enter the IP address of the primary DHCP server.”
    $sdhcpip = Read-Host “Enter the IP address of the secondary DHCP server.”
    $pdhcpscope = Read-Host “Enter the DHCP scope (ie:10.xxx.xxx.0).”

    ” “
    “Please confirm before continuing.”
    ” “

    “PVS Site Name: “+$sitename
    “PVS Collection Name: “+$collectionname
    “XenServer: “+$xenserver
    “Base VM: “+$XSBase
    “Storage Repository: “+$SR
    “Primary DHCP IP: “+$pdhcpip
    “Secondary DHCP IP: “+$sdhcpip
    “DHCP Scope: “+$pdhcpscope

    $n = ([System.Management.Automation.Host.ChoiceDescription]”&No”)
    $n.helpmessage = “No, exit script”
    $Y = ([System.Management.Automation.Host.ChoiceDescription]”&Yes”)
    $y.helpmessage = “Yes, continue script”
    $YN= ($Y,$N)

    Function Prompt-YesNo ($Caption = “Confirm”, $Message = “Do you want to continue?”,$choices = $YN)
        {
            $host.ui.PromptForChoice($caption,$Message,[System.Management.Automation.Host.ChoiceDescription[]]$choices,1)
        }

    $answer = Prompt-YesNo
        if ($answer -eq 0) {“Continue”} else {Exit}
            Connect-XenServer -server $xenserver
            cmd /c if not exist c:csv md c:csv
        if (Test-Path c:macs.txt) {remove-item c:macs.txt}
            $vmnames = get-content c:servers.txt
            $ips = get-content c:ips.txt
            Remove-Item c:csv*.*

    # Xenserver – create VMs then pull MAC addresses for each and append c:MACs.txt

    foreach ($vmname in $vmnames)
        {
        Invoke-Xenserver:VM.Copy -VM $XSBase -NewName $vmname -SR $SR
            $vifs = Get-XenServer:VM.VIFs -VM $vmname
            $vmname | Out-File c:CSVVMs.csv -append -Encoding ASCII
            $vifs.mac | Out-File c:MACs.txt -append -Encoding ASCII
        }

    # MAC Translations – Required for DHCP and PVS as MAC formats are different for each program
    # PVS MAC MCLI input format
    Get-Content c:MACs.txt | ForEach-Object { $_ -replace “:”, “-” } | Set-Content c:csvMDevice.csv

    # DHCP MAC input format
    Get-Content c:MACs.txt | ForEach-Object { $_ -replace “:”, “” } | Set-Content c:csvMDHCP.csv

    # Obtain IP addresses from ips.txt file
    Get-Content c:ips.txt | Set-Content c:csvips.csv
        $num = 0
        $items = get-content c:csvvms.csv

    # DHCP and Citrix PVS
    foreach ($item in $items)
        {
            $server = get-content C:csvVMs.csv | Select-Object -Index $num
            $mdhcp = get-content C:csvMDHCP.csv | Select-Object -Index $num
            $ip = Get-Content C:csvips.csv | Select-Object -Index $num
            $mdevice = Get-Content C:csvMDevice.csv | Select-Object -Index $num
            “Dhcp Server \”+$pdhcpip+” Scope “+$pdhcpscope+” Add reservedip “+$ip+” “+$mdhcp+” “+”`”$server`””+” “+”`”`””+” “+”`”DHCP`”” | Out-File c:csvprimdhcp.txt -append -Encoding ASCII
            “Dhcp Server \”+$sdhcpip+” Scope “+$pdhcpscope+” Add reservedip “+$ip+” “+$mdhcp+” “+”`”$server`””+” “+”`”`””+” “+”`”DHCP`”” | Out-File c:csvsecdhcp.txt -append -Encoding ASCII
    # Citrix PVS add device to Site and Collection
            Mcli-Add Device -r siteName=$siteName, collectionName=$collectionName, deviceName=$server, deviceMac=$mdevice
            $num = $num + 1
        }

    “@Echo Off” | out-file c:csvdhcpimport.cmd -encoding ASCII

    #DHCP – This will export the settings of the DHCP reservations added above
    “netsh exec c:csvprimdhcp.txt” | out-file c:csvdhcpimport.cmd -append -encoding ASCII

    #DHCP – This will import the reservations on your secondary Microsoft DHCP server
    “netsh exec c:csvsecdhcp.txt” | out-file c:csvdhcpimport.cmd -append -encoding ASCII
    “echo Please verify all objects have been created successfully” | out-file C:csvdhcpimport.cmd -append -encoding ASCII
    “pause” | out-file C:csvdhcpimport.cmd -append -encoding ASCII
    Remove-Item c:csv*.csv
    cmd /c C:csvdhcpimport.cmd